TRAIN TRACK® Web Edition Help Manual
Classes
TRAIN TRACK® allows you to schedule classes in advance and enroll employees, or allow employees to register for classes themselves. You may limit enrollment in each class by setting a maximum capacity for the class location. You may also view or edit existing classes and enrolled employees, and mark completions for a class all at once.
Add a Scheduled Class
To add a class, follow these steps
| Step | Illustration |
| 1. From the navigation bar, select Class > Add Class. | 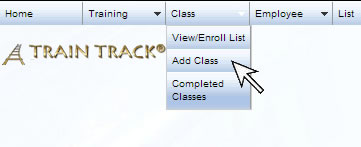 |
| 2. The Schedule Classes screen will open. Select the Training. | 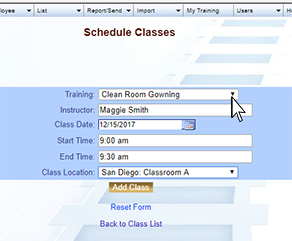 |
| 3. Enter the Instructor (optional). | 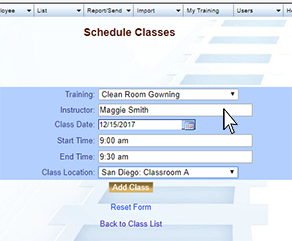 |
| 4. Select the Class Date, and enter the Start Time and End Time. | 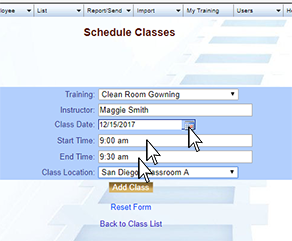 |
5. Select the Class Location. If you have added a capacity for the selected location, then enrollment will be limited to that capacity. See Class Location. |
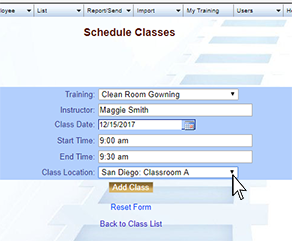 |
| 6. Click Add Class. | 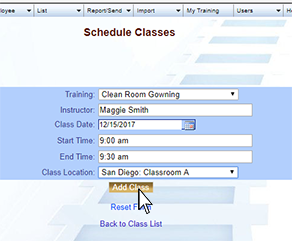 |
View Class List
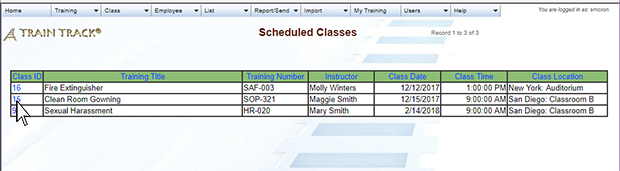
To view the list of scheduled classes, select Classes > View/Enroll from the navigation bar. The Class List screen will open. This screen displays a list of all scheduled classes for future dates.
The following fields are included:
- Class ID
- Training Name
- Instructor
- Class Date
- Class Time
- Class Location
View Class Detail
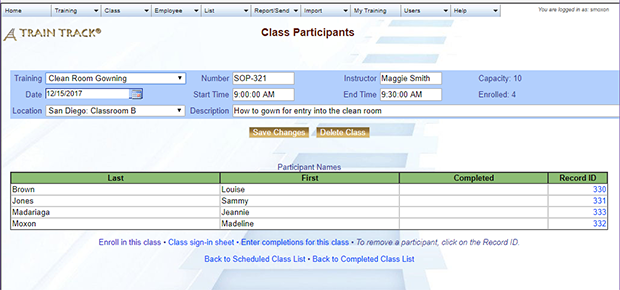
To open the detail record, select a class from the list and click on the Class ID. The class detail screen will open.
View Participants
The detail screen includes a list of employees scheduled for the class. It also displays the class capacity and the total number enrolled. There is a link to print a sign-in sheet for the class.
Enroll
Any user may enroll in a scheduled class. To enroll, follow these steps:
1. Locate the class on the class list and click the Class ID.
2. Click Enroll in this class.
3. On the confirmation page, click Enroll.
4. The email notification screen will open. If you wish to send an email notification to the employee, click Send. Note: A valid host and email address must be listed in the address field. If no address is present, you may type one in.
Completed Classes
To view the list of completed classes, select Classes > Completed Classes from the navigation bar. The Class List screen will open. This screen displays a list of all scheduled classes for past dates.
Mark All Completed
To mark completions for a scheduled class at once, follow these steps:
-
From the navigation bar, for a future class select Classes > View / Enroll or for a past class select Classes > Completed Classes.
-
The class list will open. Select the class and click on the Class ID.
-
The Class Participants screen will open.
-
From the list of participants, click Enter Completions for this Class.
-
Click Mark All Complete. The listed date will be inserted as completion dates for the enrolled employees. If one or more employees did not complete the class, you will need to go back and delete those completion records. Note that the date fields cannot be blank when adding completions as a group.
.
Delete Class
To delete a class, follow these steps:
1. Locate the class on the class list and click the Class ID.
2. Click Delete Class.
3. Click Delete.